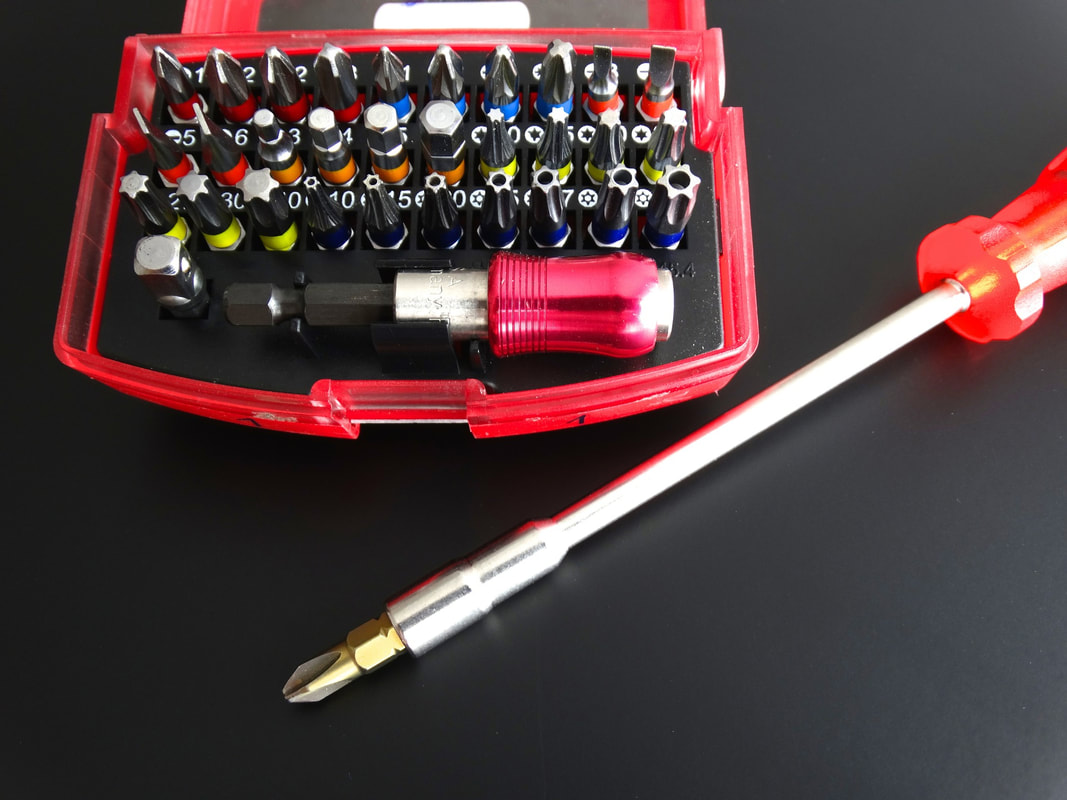
 There are many types of screwdrivers available and in recent years many specialized units have been developed such as Tri-wing, Torq-set and Hexalobular However it is unlikely that they will encounter most of the specialized units unless they are working in very specific industries.
We will focus on the three main types of screwdrivers that are in use for general use and in the automotive industry that are slotted, Philips and Pozidriv. Slotted Screwdrivers Slotted or also knows that flat head screwdrivers are the oldest of the drive types and was in use at the beginning of 1800 and is one of the most common unit that you will likely see. The flat sheet of the head must coincide with a grove in the slotted screw. When using a slotted screwdriver, it is always advisable to find the right size driver for the screw the blade tip should be the same width as the screw head and fit snugly into the slot. If an incorrect size is used, the potential for slipping out of the grove into the slotted screw increases considerably and will damage or peel the head of the screw making it very difficult or impossible to screw or remove. Philips Screwdrivers Philips or cross-screwdrivers are the second most common unit. Invented by Henry Phillips in the decade of 1930 was first adopted by the automotive industry and remains the type of dominant unit in the industry to this day. Philips screwdrivers have an X-shaped head that matches an X-shaped edge of screws. The Philips screwdriver is designed to exit deliberately (screw slippage) once a certain torque level has been reached to help prevent damage to the screw and scratch. Pozidriv screwdrivers Pozidriv screwdrivers are similar to Philips screwdrivers, but they improve on them. Where the Philips drive is designed the rounded and angled sidewalls so they will jump out the Pozidriv screwdrivers have straight sidewalls and have a second set of cross features set at 45 degrees from the central Cross, also have a small square point. This gives Pozidriv less chance of slipping out of the screw. One disadvantage of using Pozidriv is that it looks very similar and needs Pozidriv screws. It can be very easy to confuse the different screws and if the wrong controller is used it can damage the screw head. If you want to learn more visit the site: http://www.thereviewsearch.com
0 Comments
 So would you like to learn how to draw eh? Drawing is one of the most economical forms of art and it is very easy to start. You really don't need much. For the absolute beginner, all you really need is a number 2 pencil and a piece of cheap scrap paper. Eventually, however, you probably want to buy quality supplies as you become more experiences and start producing finished drawings. This article will provide you with an introduction to some of the most popular drawing materials and accessories available for today's artists.
Drawing Media Graphite Pencils: Graphite pencils, which are sometimes mistaken for "lead pencils", are nothing more than a mixture of clay and graphite ore. These pencils are usually in the form of a long bar that is enclosed in the wood. Graphite pencils vary in degree from very hard to very soft, although the hardest grades are not used as often as the softer grades. Softer-grade pencils will allow you to be more expressive with your work. You can easily find a high quality graphite pencil set online at a number of different art shops and are usually quite affordable. Graphite Sticks: Graphite is also available in stick shapes that are sold as is or can be inserted in the headlines or enclosed in plastic. Graphite sticks are classified in the same way as regular pencils and are excellent for covering large areas. Colored Pencils: If you prefer to draw in color, colored pencils can be a good fit for you. Colored pencils are available in a variety of colors and can be purchased on games as well. They are quite wax in nature, so if you like working with media that can be mixed, then this is not the right choice for you. They are best suited for techniques that use "optical mixing" as "cross-hatching" for example. Water Soluble Pencils: these are a very interesting and relatively new drawing medium. These are a wonderful alternative to watercolor paints if you prefer to work with the pencil, but still want that "watercolor" look at your job. You put your marks as you would with a colored pencil only when you apply water, your brands are instantly dissolved creating color washes. Pens and inks-Pen and ink has existed for centuries and in a moment in time was one of the most common drawing media. Drawing with ink is quite challenging and intimidating for artists due to their permanence. The inks are impossible to erase little this is not necessarily a bad thing. Each line you put adds to the expressive nature of this medium. There are many different pens available and the only way to know which one you are comfortable with is to test various pens and inks out. You have your feather style feathers which are essentially a holder that accepts several markers of different sizes and shapes. Then there are technical pens that are available in various sizes. These feathers provide the means to create coherent lines regardless of the force of the pressure. Other feathers include felt tip, roller ball, sketching pens, fountain and reed pens. Chalk-Chalk is one of the oldest drawing means of today's existence. Today, chalks are created by mixing limestone, pigments, water and a means of union. There are a variety of chalks available for today's artists. Conte crayons are a very popular type of chalk. Conte crayons are hard and less likely to break. Drawing chalks are also very popular and are very similar in appearance and texture to cakes. Charcoal-charcoal is made from calcined Willow and is a very versatile medium. Like chalk, it is also a very old medium that has been in existence for hundreds of years. The charcoal is a very expressive medium and produces Rick, dark lines. Like graphite, charcoal is also sold in several grades from hard to soft and is available in different sizes. Cakes-cakes can sometimes be difficult to classify as certain pastries such as soft and oil pies, can be applied in almost pictorial way. However, because they cannot be mixed in the same way as paint can, and therefore are classified as means of drawing. Cakes come in a variety of different formats. Some of the most popular are soft pastels and oil pastels, but they also come in pencil, crayon and water soluble varieties. Drawing Accessories Sharpeners-There are a variety of different ways to keep your pencils or sharp drawing media. Always try to keep your pencils sharp to a fine point. You'll get a cleaner line, more straightforward that way. The best type of sharpener is really a matter of personal preference. Manual sharpeners are believed to be a better option as there is more control and less waste making them more economical. If not used correctly, an electric pencil sharpener may devour the pencils. Sometimes a sharpened art knife is used and creates a longer point to work with. Drafts-drafts are available in a variety of different shapes and materials. One of the most used and most effective drafts is the kneaded draft. A kneaded eraser is almost like silly Putty and can be molded in any way that makes it an excellent tool to erase small areas of a drawing and a kneaded eraser leaves no marks or unwanted residues. Fixatives-fixatives are used to create a protective seal on the drawing surface to prevent stain work. Fixatives can be used during the drawing process to protect each layer as it goes or when a drawing is completed to create a permanent protective layer. Not all artists use fixers as some feel they can ruin a drawing. It is really a personal preference that is always debated. Tortillones-Tortillones are blending tools made of strongly pointed pointed paper. They are very similar in appearance to pencils. The paper can be peeled away as the surface of the Tortillón is soiled by the drawing medium. Tortillones are used for mixing purposes. Get more information visit the: www.http://myreviewcenter.com Caulking can usually be found in the seams of two materials, on the corners, baseboards, doors and around the tub or envelope. In order to recaulk an existing seam or caulk a new seam of the area should be clean of debris. In other words, if you plan to recaulk your bathtub impeller then you will need to remove existing caulking. If you purchased the Pro Caulk system found on this page, then you will have an old caulking removal tool, otherwise you will use a large flat screwdriver and chisel hammer and scrape. If you are using this method, you should be careful not to damage the scraping bonding substrates or by scraping the bathtub or tile surfaces. Usually if you get a piece of the free caulk you can take it with a couple of pliers and pull it like a rope all the distance from the wall or maybe all the envelope. Beware of old or loose tiles, as removing the putty can cause the tile to pull the wall, breaking into the bottom of the tub. Sometimes it's a good idea to run the blue ribbon of the painter around the bottom tiles of the envelope to keep them in place and place an old blanket in the bottom of the tub to avoid breaking anything that falls off the wall and also to prevent its tools from scratching the existing surfaces. Similarly, you can also tape the top of the bath surface to an inch of a quarter away from the wall to help protect the bathtub in case your screwdriver or chisel slides. Once the old putty has been removed, take a green matorrata or a hard brush with or without soap and water and clean the seam surfaces until smooth, in the case of two wooden substrates such as doors, cabinets, to soften the area to be caulked, however they do not go beyond the area that the caulk will cover. A good caulking account is usually 1/8 "to 1/4". If the area you are caulking seems to be much larger than 1/4 "you may need to fill the vacuum with expansive foam or repair the substrate first. If you use spray foam, let dry then cut or sand so that excess is space to apply caulk for a good moisture-proof and esthetic seal. Using any of these methods it is important to wear gloves, protective clothing and goggles and also to maintain ventilation if you are working in a closed room. The next step after removing the old caulk and cleaning the area is to apply new caulking. A minor note, the material in the grout lines is not caulking and caulking will not adhere or replace grout. It is also best to replace a tile or a soap dish with a suitable adhesive or ceramic mortar. Caulking will not permanently adhere to objects of any significant weight to a wall or ceiling. It is best to consult with a local ceramic distributor for instructions on these and major repairs. Now as with most construction compounds there is an enormous amount of information and technical data to which caulking to use for any imaginable application. For general home Use there are three basic types silicone, acrylic and latex based. Caulk latex comes in white as well as a series of pastel colors. The silicone putty can usually be found in white, black and clear and acrylic caulking is usually white. Although caulking can be painted the best is just to get it in the right color to start. Silicone caulking is best for outdoor applications, but can be used anywhere. It is the most waterproof, but unless you are buying the Pro Caulk tools, it will be the hardest to work, especially for the surroundings of the tub. Latex caulking is widely used for most indoor applications and will be the easiest to work and clean. Once opened Caulk is not maintained for more than a couple of weeks, so be sure to get the right amount. The tube will tell you the coverage. Caulking is available in a pinch tube or a cartridge that fits into a caulking gun. Choose what you think will be easier to use. Of course, if you have a considerable amount of caulking to make, cartridges and a gun will be more economical and faster to use. It is easy to find you to know about this topics to visit the site: The Review Search 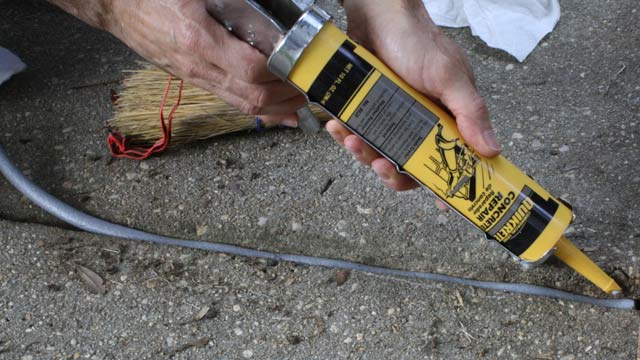  Planned with a cutting edge or set of sharp edges particularly situated to finely shave the surface of a load up or board of wood, a hand-held power planer is utilized to make level, even surfaces or to expel flaws from a bit of wood. Obviously, for the instrument to convey the smooth, uniform outcomes required via craftsmen and woodworkers, a planer's edges must be sharp as a tack (or, maybe, similarly as sharp as a truly sharp cutting edge). As needs be, it is imperative to the usefulness of your planer and to the result of your activities, that you supplant your planer sharp edges as they end up plainly dull or harmed.
Luckily, it is quite easy to supplant planer edges in a hand-held power planer. Truth be told, the methodology requires minimal more than some alert, a screw driver or tighten, and the right swap edge for your device. Much of the time, in light of the fact that most planers edges are reversible, the right substitution is basically on the opposite side of the current cutter. If not, finding the correct substitution cutting edge requires the model number of your planer and next to no else. Despite the fact that the specifics of every planer cutting edge substitution methodology will fluctuate somewhat by model and maker, the general strides are the same. To start this methodology, you should first totally separate the apparatus. Second, relax the attaching jolts that protected the sharp edge. Following this, you just need to expel the cutting edge from the sharp edge opening. Since planer cutting edges are sharp and sensibly hard to deal with as one endeavors to juggle them from an instrument, it is shrewd to utilize a level make a beeline for direct the them out and afterward in once more. Obviously, you should expel the sharp edge. Next, you basically rehash this procedure on the inverse side of the planer's drum (or, the tube shaped piece that holds and pivots the edges). Turn the drum 180-degrees to the second sharp edge. Slacken any attaching jolts and precisely slide the second cutting edge from its space. Appropriately discard any sharp edges not being reused. After the two sharp edges have been securely expelled, you may now start introducing the new ones. In the first place, every edge ought to have an indent that lines up with an opening in the drum. Just match the indent to the space and slide the cutting edge (with the sharp edge confronting the nose of the instrument) into its opening on the drum. Mostly fix the jolts that safe the cutters to the drum however don't totally fix them until the point when the edge has been focused. Outwardly investigate to position of the sharp edge to guarantee there is no shade on either side of the chamber. The sharp edge ought to be the very same length as the drum, in like manner, if the cutting edge is not impeccably lined up with that drum, it will rub against one (or the other) side of the planer. Once the cutting edge is splendidly focused, totally fix the jolts. Turn the drum another 180-degrees and rehash this procedure to introduce, focus, and secure the second sharp edge. In the wake of guaranteeing all jolts are totally fixed, connect with the planer in a little wood activity to guarantee all is well amongst planer and its cutting partners. 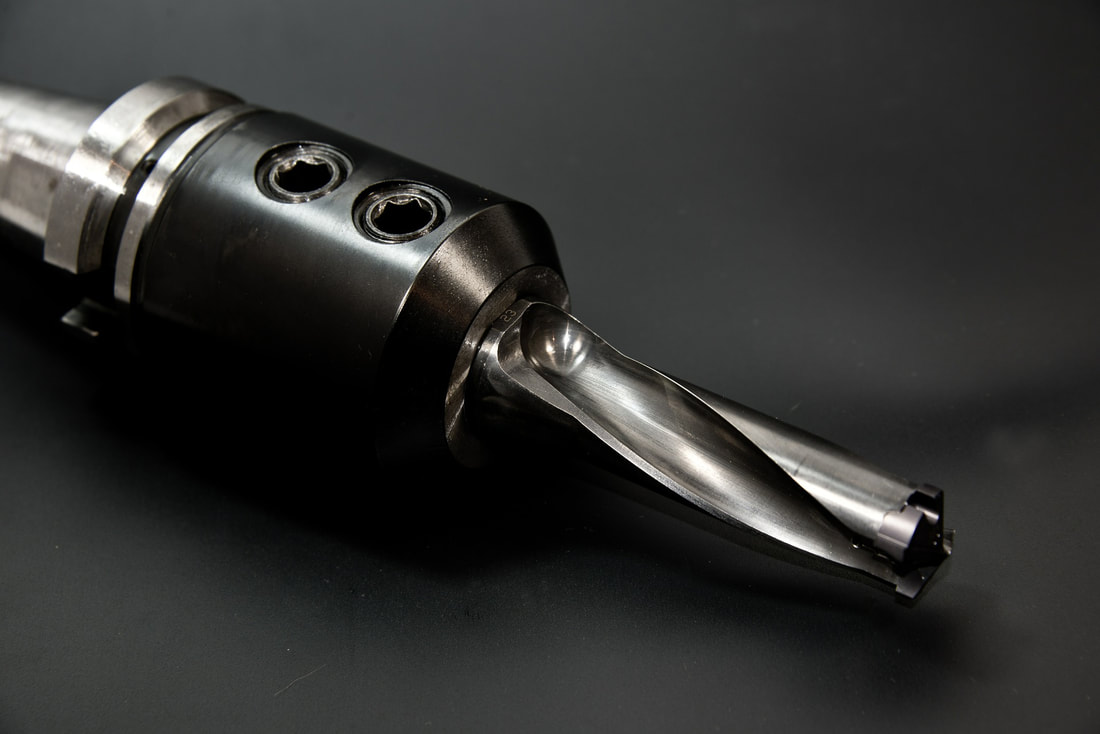
Using the correct device for each employment quite often spares time and prompts a higher quality finished result. Hole saws are intended for cutting vast holes in materials using a barrel shaped sharp edge appended to a bore, however standard bi-metal hole saws are not prepared to slice through simply any sort of surface material. The carbide tipped hole saw is a particular hole saw that can without much of a stretch handle extends that surpass the ability of the run of the mill hole saw.
The carbide tipped hole saw is outfitted with precisely built tungsten carbide teeth, giving it the quality to fulfill popularity occupations, for example, slicing through stainless steel or extreme composites. Tungsten carbide is a to a great degree hard intensify that gives carbide tipped hole saws enormous quality and warmth resistance, properties that are basic for slicing through extreme material, for example, stainless steel. The persevering wear resistance of tungsten carbide additionally makes it an appealing material for machines in large scale manufacturing runs. The material that gives these saws their enduring solidness - tungsten carbide - is used for an assortment of purposes spreading over a few businesses. Because of its quality and impervious to wear, tungsten carbide is generally utilized as a part of the fabricate of many wedding bands, ballpoint pens, trekking posts and even military ammunition. For the most part, carbide tipped hole saws and additionally most other hole saws are intended to enter materials measuring around an inch thick. Numerous experts consider a carbide tipped hole saw to be a basic device for lighting apparatus establishment, entering metal studs, intersection box work and auto body repair. Enduring sturdiness and applications crossing from electrical apparatus establishment to pipes make the saw a basic instrument for proficient tradesmen, for example, general contractual workers, handymen, circuit repairmen, mechanics and even DIY home change lovers. Preceding using any power device, it is encouraged to altogether read and hold fast to the maker's suggestions and well being notices. Some carbide tipped hole saw producers may not suggest use on specific metals or on materials surpassing a particular thickness. You May Also Like to Read Choosing the Best Drill For the Job Choosing the Perfect Cordless Power Drill 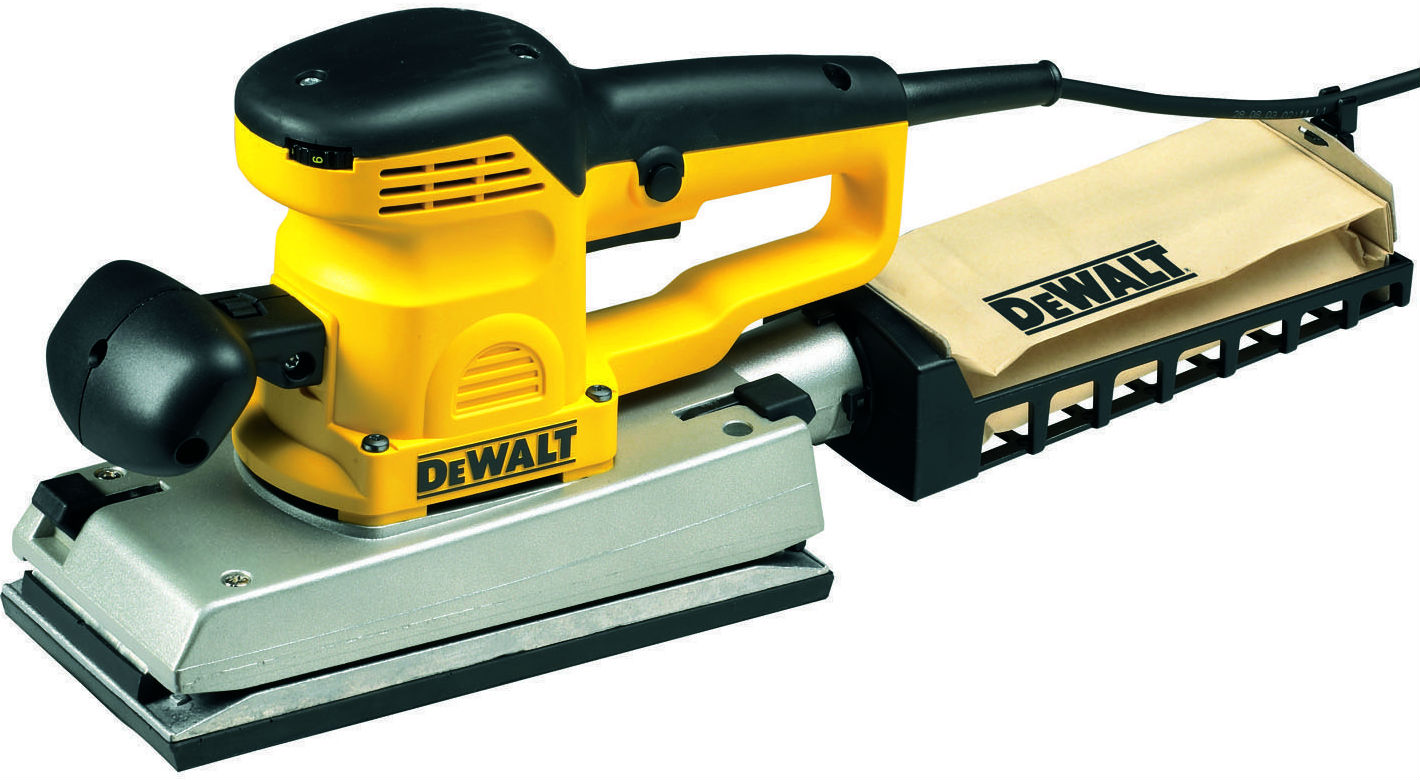 Devices are critical in the development business. They make work less demanding and complete work speedier. On the planet today, there are many organizations that are fabricating instruments that are utilized as a part of development. One of the world pioneers in this is the Dewalt Company. This organization continues delivering better than ever devices as the years pass by. They typically do a survey of the past device they created and upgrade the elements so it can accomplish more. The Dewalt D26420 orbital sander is one of the instruments that they have fabricated. We will take a gander at a portion of the determinations and capacities that make this device an incredible one for sanding.
The info energy of the Dewalt D26420 is 350 watts. The power is created by 230 volts which runs the engine. The length of this sander is 270mm and the engine is equipped for delivering 22,000rpm (cycles every moment) which is an astounding rate for sanders of this sort. This is on the grounds that it keeps running on 2.4amp. Being an orbital sander, it creates an orbital rate between 12,000 to 22,0000opm (circle every moment). This for the most part relies upon the surface that it is being taken a shot at. This sander accompanies a cushion which measure 112x236mm. The sheet estimate is 113x280mm. The general weight is 2.8Kgs. This empowers versatility of the device. Another element of the Dewalt D26420 is the counter tricky material that has been utilized on the handle. A specialist has a firm grasp on the instrument when working with it in view of this against elusive material. This material additionally empowers a client to be agreeable when utilizing the sander. A client will likewise be less exhausted due to the counter vibration framework that has been fused in the apparatus. There is a switch which is tidy fixed with the goal that the clean which is delivered when the instrument is in operation can be expelled and in the process broadening the lifetime of the switch. The sander accompanies a clean sack where the tidy is collected and arranged off when essential. A vacuum connector can likewise be found inside the apparatus so tidy from the earth can be drawn in and arranged off well. The Dewalt D26420 orbital sander is intended to keep going for quite a while with no flaws since it has been 100% fixed and it has been built utilizing the metal roller development. You can read more Dewalt D26420 orbital sander on different sites before buying one for yourself. |
